Sunday, December 17, 2017

Sweet Potato Challah

I've been meaning to post this recipe for ages. Sweet potato is my new favourite way to replace eggs in enriched bread dough recipes. It makes the final loaf nice and soft, and adds colour to the dough that     mimics the many egg yolks of non-vegan challah. This is a version of Peter Reinhart's recipe from Artisan Breads Everyday, but I use a blender to incorporate the potato into the liquid ingredients. You can let the dough rise in the fridge, then shape and bake the next day as he calls for, but I usually just do everything in the same day because I don't have the time or the fridge space to follow his method. The recipe produces reliable results every time. Trust me: I make at least two recipes a week so the kids have buns for school lunches.


Makes 2 loaves, or 16 buns
INGREDIENTS
All measurements are weight, not volume
- 17oz warm water
- 2.5 oz oil
- 4 oz cooked sweet potato (see note* way below)
- 3 oz sugar
- 14 g instant yeast
- 19 g salt
- 2 lb 3 oz bread flour
- soy milk for brushing

METHOD
1. Place water, oil, sweet potato, sugar, yeast, and salt in a blender. Blend until smooth.
2. Add liquid to flour in a large bowl and bring into a dough. Knead until smooth. 
3. Shape into a ball and let rise, covered, in a large oiled bowl until doubled in size. 
4. From here, YouTube is your friend. Determine how many braids you want in your loaf (the pic above is a 6 braid) and find a video for how to braid it. Remember that the recipe makes two loaves.
5. Place braided loaves on a cookie sheet lined with parchment paper (ideally both loaves on one big sheet). Brush with soy milk.
6. Leave to rise, uncovered, in a warm place until almost doubled in size (about 1 hour). Keep brushing with soy milk every 15 mins or so, to keep the dough from drying out and to build up layers of soy milk (this will give the loaf that glossy finish when baked). 
7. While dough is rising, preheat oven to 350. 
8. Bake for 20 mins, then rotate the pan and bake for another 15-20 mins, until the loaves are evenly browned and sound hollow when thumped on the bottom. A convection oven really helps get an evenly browned loaf. 

A NOTE ON BUNS
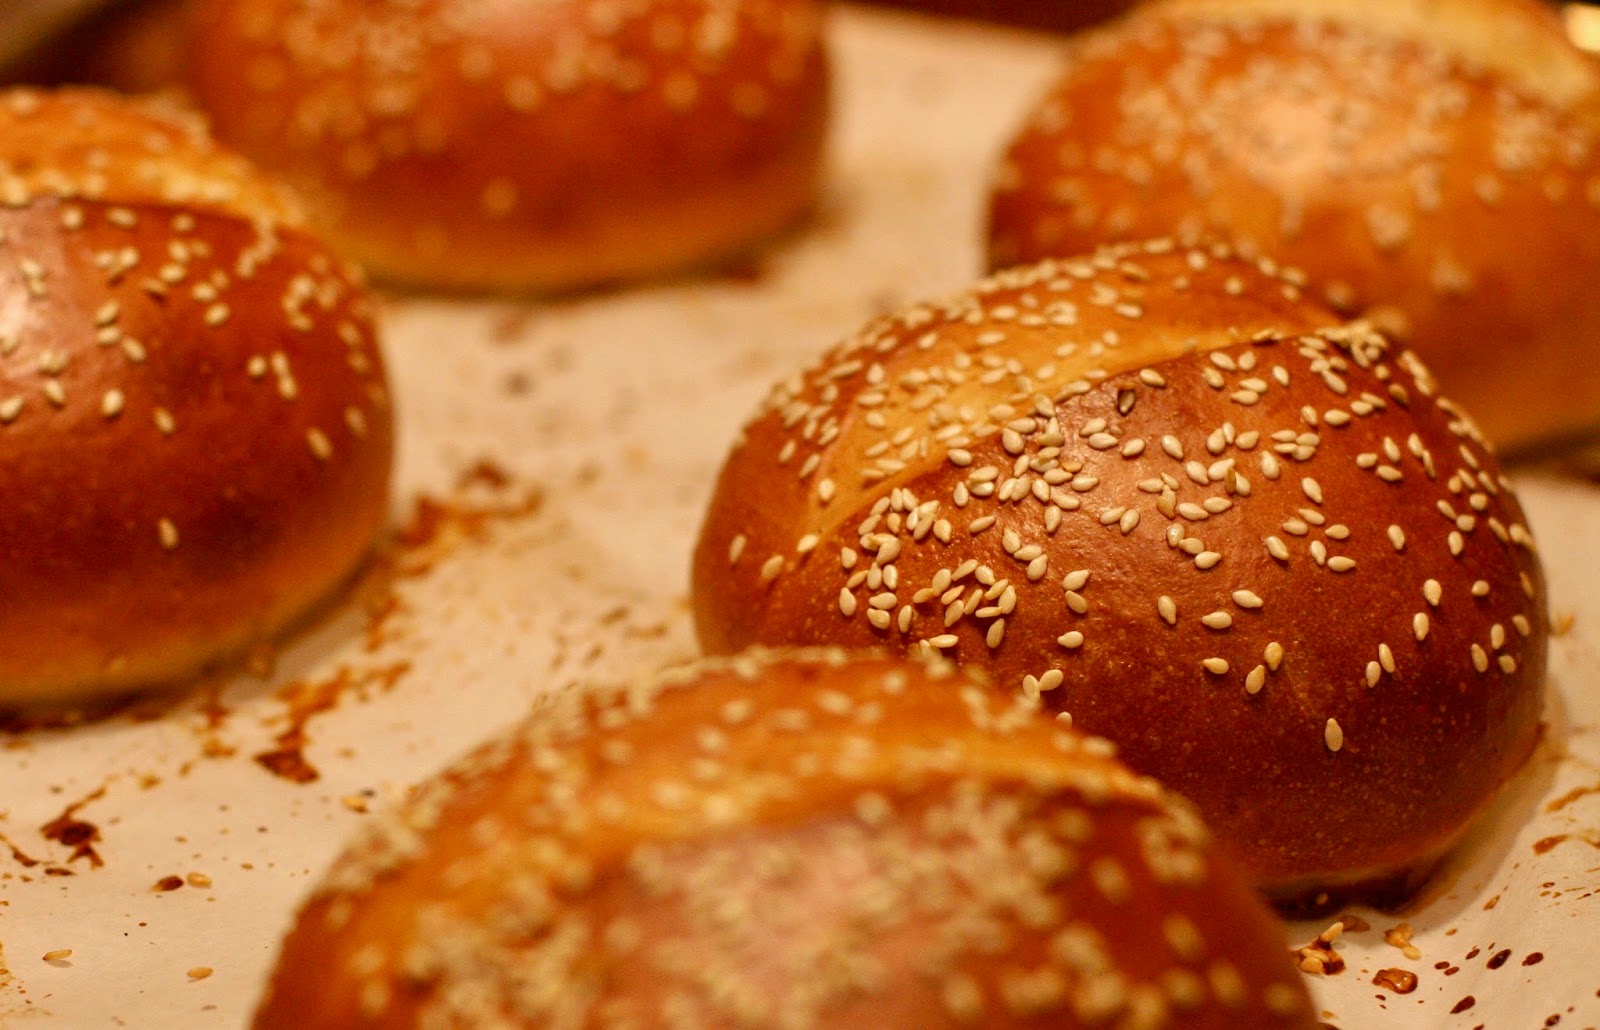
This is also my go to recipe for buns--it makes 16 buns that I do as a 4x 4 batch bake on a large sheet pan. Brush them with soy milk like the loaves, but bake at 400 for 15-17 mins, rotating the pan half way through. Or, space them apart, slash the tops before baking, and sprinkle with sesame seeds after the last brushing with soy milk (as pictured below).

Or do hot dog/sausage buns. 

*Note: I prick the skin of a sweet potato a few times with a fork, then cook it in the microwave on the potato setting. It's fast and makes for a sweet potato that is not too wet. 

Monday, December 4, 2017

Crispy Fried Cauliflower Wingz


This recipe is perfect for your upcoming holiday party! Or tuck it away until the Super Bowl. An indulgence, to be sure, but you deserve it. I've been meaning to work up a recipe like this since the cauliflower "wings" craze hit the interwebs a while ago, but I never got around to it. These are crispy and flavourful, and remain so even when they are no longer hot. The boys doused theirs in Buffalo hot sauce, while the rest of us stuck to a sweet BBQ sauce. Delicious! 

INGREDIENTS
- 1 large head of cauliflower, cut into florets

Brine
- 2 cups cold water
- 1 tsp garlic powder
- 2 tsp onion powder
- 2 tsp smoked or seasoned salt
- 2 tsp paprika
- 1 tsp poultry spice

Batter
- 2 cups all purpose flour
- 1 cup panko crumbs
- 1/2 cup chickpea flour
- 1/2 cup tapioca flour/starch
- 1 tbsp each: onion powder, garlic powder, paprika, Italian seasoning
- 1 tsp white pepper
- 2 tbsp apple cider vinegar
- 3 cups plain soy milk (more if needed)

METHOD
1. The day before: mix together the brine ingredients (I use a blender). Pour into a large freezer bag, then add the cauliflower florets. If your cauliflower is very large, you can make a 1.5 recipe of the brine. 
2. Remove as much air a possible so the brine is making maximum contact with the brine. Refrigerate for at least 12 hours, rotating the bag as needed for even brining. 

3. The Day of: drain cauliflower in a colander. Heat oil in a deep fryer to 350 degrees.
4. While cauliflower is draining, whisk together the dry ingredients for the batter (i.e. flour to white pepper). 
5. Dredge the cauliflower in the flour mixture in batches until coated. Shake off all excess and place on a baking sheet.
6. In a separate bowl, whisk together vinegar and soy milk. Add enough of the soy mixture to the remaining flour mixture to make a thickish batter. Add more soy milk if needed.
7. Add some pieces of cauliflower to the batter. Turn to coat. Leave the cauliflower in the batter for a few minutes to allow the batter to soak into the dredging flour.
8. Shake off excess batter and transfer to a cooking tray or plate. 
9. Fry in oil, 3-4 minutes per side, until deep golden brown. Make sure your oil is not too hot or the outside will burn before the cauliflower is cooked.
10. Drain on paper towels and serve while still hot.

NOTE 1: while one batch is frying, add another to the batter so it can soak. Repeat.
NOTE 2: add more soy milk to the batter, if needed. The dredging flour will thicken the batter a bit, so just thin it down again. 

Saturday, November 4, 2017

(Jalapeno) Sauerkraut


I feared fermenting veggies for a long time. What if I give my family food poisoning? How will I know if something is fermented properly? Isn't it all too complicated? But now that I took the plunge, I wish I had done so earlier. This recipe, even though it has 8 steps, is utterly simplicity and produces a tender, tangy, and flavourful kraut. A chopped jalapeño only deepens the flavour without adding too much heat. Add two if you want more zip. I'm not a big fan of veggie dogs, but with a homemade bun and this kraut, I would eat them any day.


INGREDIENTS
- 1 head of cabbage
- 2-3 tbsp coarse salt (like pickling or kosher salt)--more as needed
- 1 chopped jalapeno pepper (including seeds)--optional

METHOD
1. Remove 2-3 outer leaves from the cabbage.
2. Core cabbage, and slice very thinly (a food processor works wonders here).
3. Woking in batches if necessary, place cabbage (and jalapeño, if using) in a large non-reactive bowl and sprinkle with salt. Start mashing/squeezing the cabbage with your hands, or use a wooden sauerkraut pounder. This will force liquid from the cabbage. The cabbage will start to go translucent, and you should get a good amount of liquid from it. If not, use a little more salt.
4. Transfer the cabbage to a large glass jar. I use a big 56 oz jar. Tamp down the cabbage (here is where the sauerkraut pounder really comes in handy) so that the liquid covers the cabbage.
5. Cover the cabbage with the leaves your removed in step 1. Rip the leaves into small pieces if necessary. Fully cover the cabbage right to the edges of the jar. Use a knife to tuck the edges down a bit so that pieces of cabbage don't float tup during the ferment (see pic above).
6. Tamp the cabbage leaves down so that they are submerged.
7. Place a smaller jar (or something non-reactive) on top of the leaves. It needs to reach the top of the bigger jar.
Place the canning lid on upside down (i.e. rubber seal up), and then tighten on the metal ring. The idea here is to keep the kraut and leaves compressed and submerged throughout the ferment. The upside down lid will allow gas to escape during the ferment.
8. Place somewhere away from sunlight and direct heat (coolish room temp is great). Ferment away! I think 1.5 weeks makes for the perfect kraut. It will bubble and foam--this is what you want to see. Check every few days: remove the lid and take a sniff. It should not smell rotten or unpleasant. To my nose, kraut that has not fermented long enough has a slightly metallic air to it which mellows out after about 10 or 11 days.

Remove the cabbage leaves from the top and enjoy! Refrigerate until used up.

Friday, September 15, 2017

Spanish Style Tofu and Potatoes


This is a simple and tasty dish that is perfect for the end of summer when all your tomatoes are ripe. 

INGREDIENTS
Serves 6 to 8
- 2.5 lbs potatoes, cut into chunks
- 1 large Spanish onion, halved and sliced
- 4 garlic cloves, minced
- zest and juice of one lemon
- 1 pkg tofu, diced
- 6 cups tomato wedges
- 2-4 tbsp olive oil
- 1.5 tbsp smoked paprika
- salt and pepper to taste
- chopped parsley (optional)

METHOD
Preheat oven to 400 degrees
1. Combine all ingredients (except parsley) in a large bowl and toss to coat. Transfer to a large baking dish with sides.
2. Bake for about an hour, stirring regularly after the first twenty minutes, until potatoes are tender. Garnish with chopped parsley, if desired. 

Thursday, September 7, 2017

Pressure Canner Beans in Tomato Sauce

My kids like to take these beans in a thermos to school for lunch (often with veggie dogs cut up into them for what we call "Beans and Weens"). With a pressure canner you can easily make your own at home without having to soak a single bean.  Below is a basic recipe that you can adjust according to your size of jar, the number of jars you want to make, and your tastes.

When cooking dried beans in a jar in a pressure canner you want 1 part dried beans to 3 parts liquid. So, in the recipe below, 1 cup of beans is cooked in 3 cups of liquid in a 4 cup (1 quart) jar. If you are using pint jars (2 cup) then use 1/2 cup of dried beans to 1.5 cups of liquid.

As for the liquid/sauce, do whatever suits your tastes. If you are canning 7 one quart jars, you need 21  cups of liquid. It's best to have at least 8 cups of water so the beans cook properly, but you can play around with other ingredients. Less sugar, more tomato, for example. More sugar, less tomato sauce +  a cup or two of ketchup + mustard + chilli powder+ hot sauce = beans in BBQ sauce (as an example).

Making the liquid a little on the salty side is OK because the beans will soak it up. Have made a few batches of bland beans that needed salt when served, so I lean towards the 4 tbsp side of things now.

Finally, if you have ever canned before then you know that "leakage" can be a problem. I have found that this problem can be ameliorated by doing 2 things: 1. leaving enough headspace in your jar; 2. realizing that "fingertip tight" can be pretty darn tight. Inevitably, some sauce will leak out of the jars during processing. Not to worry. Take the rings off and wipe down the entire jar before storing. 

INGREDIENTS
Makes 7 quart (4 cup) jars
- 8oz/227g/1 cup dried navy beans x 7

- 2 tbsp oil
- 1 large onion, small dice
- 4 garlic cloves, minced
- 2  48 fl oz cans tomato juice
- 8 cups water
- 2 cups packed brown sugar
- kosher salt to taste (2 to 4 tbsp)

METHOD
Sterilize your jars. Prepare your pressure canner.
1. Heat oil over medium heat in a large pot. Saute onion for 5-7 mins, until translucent. Add garlic and cook for 1 min.
2. Add tomato juice, water, sugar, and salt. Bring to boiling.
3. While sauce is heating, add 8oz/227g of dried beans to each sterilized jar.
4. Ladle hot sauce into the jars, leaving a good 1" of head space. If you are short on liquid, top up with boiling water. Top with lids and tighten the rings as much as you can with your fingertips.
5. Process the jars per your pressure canner's instructions at 11 lbs of pressure for 90 minutes. Remove canner from the heat and let pressure drop before removing the jars. 

Saturday, August 26, 2017

Indian Burgers


As promised, here is the burger recipe to go with the naan bun recipe. The burger is durable, but is better suited to the oven than the grill. 

INGREDIENTS
Makes 6 large burgers
- 1 medium onion, minced
- 1/2 cup coarsely grated zucchini
- 1/2 tsp salt
- 2 cups chopped cauliflower (small pieces)
- 2 cups small diced potato
- 2 cloves garlic, minced
- 2 tsp minced ginger
- 1/4 cup chopped cilantro
- 1 tsp turmeric
- 2 tsp garam masala
- 1 tsp cumin
- 1 tsp chili powder
- 1/4 tsp ground fenugreek
- 1 tsp salt
- 1/4 cup vital wheat gluten
- 1/4 cup chickpea flour

METHOD
1. Mix together onion, zucchini, and salt in a small bowl. Set aside.
2. Blanch cauliflower and potato in boiling salted water for 5 mins. Remove from boiling water and plunge into cold water. Drain. Rinse again with cold water and drain well.
3. By this time the onion and zucchini should have released a bunch of water. Squeeze out as much water as you can with your hands and place onion/zuke mixture in a new bowl.
4. Add 2/3 of the potato/cauliflower mixture. Mash the remaining 1/3 of the mixture with a fork, and add to the bowl. Add the garlic, ginger, cilantro, spices and salt and mix well.
5. Add the gluten and chickpea flours and mix well.
6. If necessary, mush/squeeze the mixture with your hands to bring it together.
7. Line a baking sheet with parchment and lightly oil it.
8. Divide mixture into 6 and press into a ring mold to make the burgers. Mist with oil and place in the fridge to chill.
9. While burgers are chilling, preheat oven to 400 degrees. Bake burgers for 10 mins, then flip, spray with oil, and bake for another 10 mins. Let stand for 5 mins before serving.

As you can see from the pic, I served these with with onion rings on top. I used this recipe, but cut the onions into rings and fried them separately. I dressed the burgers with vegan mayo, green tomato chutney, lettuce, and tomato.

Naan Buns


When we were in Quebec City last week vegan food for the entire family was pretty hard to come by. We ended up eating at a burger place that had some vegan options: tofu on a bun, or something they called L'Indien. It was more like a large falafel on a bun, but the kids were more or less pleased with it. The idea is a good one, so I made my own version when I got home (caveat: I did not actually eat the original burger because fried food and me don't get along. Thanks, Crohn's!). First up, the naan bun. Next, the burger.

INGREDIENTS
Makes one dozen buns
- 2 cups warm soy milk
- 1 tbsp sugar
- 1 tbsp lemon juice
- 1 tbsp yeast
- 775g/1lb 11oz all purpose flour
- 3/4 tsp salt
- 1 tsp baking soda
- 1 tsp baking powder
- 3 tbsp oil

METHOD
1. Whisk sugar and lemon juice into the soy milk. Whisk in yeast and set aside to fully dissolve and get frothy.
2. Whisk together flour, salt, baking soda and baking powder.
3. Add oil and yeast mixture to the flour and bring together into a dough. Knead for about 5 mins, or until smooth. Shape into a ball and placed in an oiled bowl, covered, to rise for an hour.
4. Divide the dough into 12 pieces and shape into boules. Press each boule into a flat, puck shape with your finger tips. Place on a baking sheet lined with parchment paper (or two, depending on the size of your oven and baking stone). Mist buns with oil, then cover. Place another baking sheet on top of the buns (this will let them rise but keep the puck shape) and let rise for about 45 mins, or until almost doubled in size.
5. While bread is rising, place a baking stone on the middle shelf of the oven and preheat to 450 degrees.
6. The buns work best if you bake them directly on the hot stone. I slide the parchment off the pan and on to the stone, but you could just put the pan right on the stone. In any event, brush the buns with water (top with poppy seeds if you want), and place in the oven. Reduce heat to 400 degrees.
7. Buns right on the stone will bake in 8-9 minutes. Buns on the sheet won't be far behind. Bake until buns are a deep golden brown and sound hollow when thumped on the bottom.
8. Cool on wire racks and enjoy!

Monday, May 29, 2017

Grilled Mushroom Caesar Salad


This is a recipe I developed over two years ago that never saw the light of day. With BBQ season now upon us I thought would dust it off. There is perhaps nothing I love more that a marinated, grilled oyster mushroom. And certainly everyone will think you’re a fun guy when you make this traditional side salad as the main meal—all done on the barbecue!

INGREDIENTS
Dressing:
·      ½ cup (125 mL) soy milk (more as needed)
·      ½ cup (125 mL) vegan mayonnaise
·      2 tsp (10 mL) freshly squeezed lemon juice
·      2 small cloves garlic, minced
·      1 tbsp minced capers
·      ½ tsp each light soy sauce, brown sugar
·      ¼ tsp each apple cider vinegar, mustard powder, onion powder
·      1 tsp miso
·      pinch ground ginger
·      salt and pepper to taste

Salad:
·      2 small hearts of romaine lettuce
·      ¼ cup (60 mL) freshly squeezed lemon juice
·      2 tbsp (30 mL) olive oil
·      seasoned salt
·      16 large shitake mushrooms, stems removed
·      3/4 lb (375 g) oyster mushrooms, stems on
·      1/2 cup (125 mL) croutons

METHOD
Oil grill and preheat barbecue to med-high 
Dressing
1. In a medium bowl, whisk together dressing ingredients. Season to taste with salt and pepper and thin with more soy milk to get desired consistency. 

Salad: 
1. Slice romaine in half lengthwise, leaving core intact. 
2. In a medium bowl, whisk together lemon juice, oil, salt and cayenne. Lightly brush over cut side of romaine. Set romaine aside on a tray. 
3. Place mushrooms (cut oyster mushrooms into smaller pieces if needed) in remaining lemon juice mixture in a baking tray. Toss to coat. Season with seasoned salt. Let marinate for 15 mins 
4. Place romaine cut-side down on grill. Place mushrooms on grill. Barbecue romaine for about 3 mins on the oiled side, and mushrooms, about 3-5 mins per side. 
5. Set each romaine half on a plate. Divide shitake mushrooms evenly among the plates. Remove stems from oyster mushrooms and divide among the plates. Scatter with croutons. Drizzle with dressing. Serve.

Thursday, January 19, 2017

1:15 Buns

Welcome to the new year! If your 2017 is going to be anything like my 2016, then you will need this recipe to get some rich bunly goodness into your meals post haste. They are a little more stodgy than a regular bun, but, hey, you can make these in one hour and 15 minutes and they taste better than anything from the grocery store. The key is to have a nice warm place to help the dough rise quickly. The baking powder also gives them a better oven rise.

Makes 6 buns
INGREDIENTS
- 15 oz bread flour
- 1 tsp baking powder
- 1 tsp salt
- 3 tbsp sugar
- 1 tbsp instant yeast
- 1/2 tsp apple cider vinegar
- 4 oz warm soy milk
- 5 oz warm water
- 1.5 oz oil

- warm soy milk for brushing
- sesame seeds

METHOD
0:00 - 10:00: Whisk together flour, baking powder, salt, sugar, and yeast. Whisk apple cider vinegar into the soy milk, then whisk in water. Add to flour along with the oil. Bring into a dough and knead until smooth. Shape into a ball.

10:00 - 30:00: Place dough in an oiled bowl, cover, and let rise in a warm place.

30:00 - 35:00: Shape dough into 6 boules. Place onto a baking sheet lined with parchment paper. Flatten into more of a puck-like shape. Brush with warm soy milk.

35:00 - 50:00: Let buns rise in a warm place, brushing with soy milk one more time half way through  the rise. Preheat oven to 400 degrees.

50:00 - 60:00: slash buns about 1/3 of the way through with a sharp knife. Brush once more with soy milk and sprinkle with sesame seeds. Finish the rise. The final buns won't have as much rise as a regular dough but don't worry, they have a good oven rise.

1:00:00 - 1:15:00: Bake the buns for 7.5 minutes, then rotate pan and bake for another 7.5 minutes. Cool and serve.